Tutorial 3
The season is here, its time to celebrate joy, laughter and fun. I don't know about you all but i'm definitely in that Christmas mood. Christmas is definitely one of my favourite time of the year. Especially when there are so, so many different Christmas inspired nail designs to create.
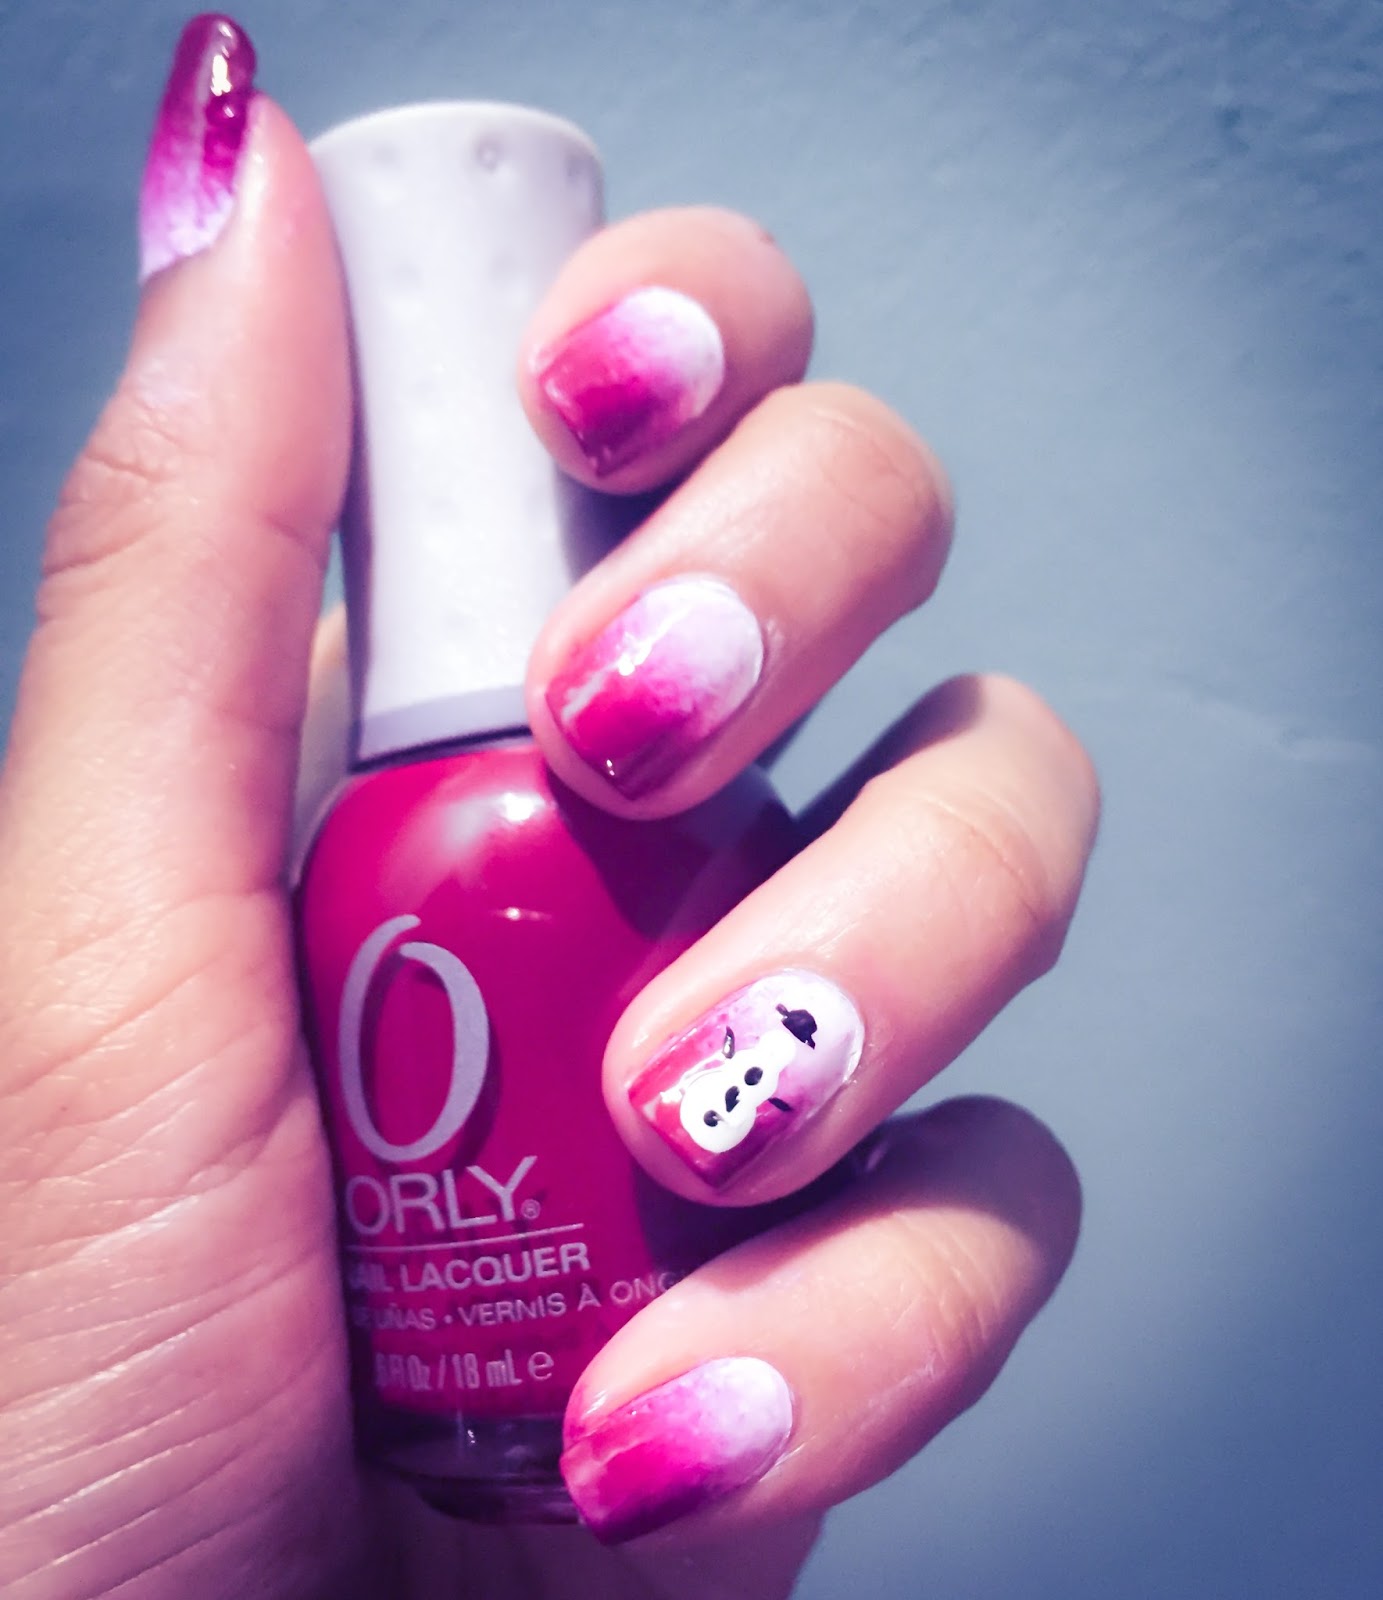
What other colour you can think of than red when it comes to Christmas.
I've got a beautiful tutorial for you that involves red and white ombre nails and a snow man accent nail.
Remember you can always switch it up. Try using Green and white, blue and white for that frosty look and even silver glitter.
Curious to know more?
Follow these easy DIY steps.
- Choose the colours you would like to work with.
- Paint nails with desired base coat.
- Paint white and then red polish on sponge.
- Dab/ Press onto nails continuously until you get the perfect ombre.
- Clean up edges with remover and small brush,
- After polish has been dried.
- Paint a large dot of White polish on top of Ring finger.
- Paint a medium dot of white polish above large dot.
- Paint a small dot of white polish above medium dot.
- Use a toothpick or very fine point dotting tool and black polish to create buttons on the snowman.
- Add a stripe on each side of the snowman to create arms.
- Add a stripe and a dot to create a hat above the snowman's head.
- Use desired glossy topcoat to finish off your manicure.
Click on the video below to view.
Final Look
Illicit Nails is open to any suggestions or comments you may have. Please feel free to provide your feedback and comments in the comment section below.
No comments:
Post a Comment